Flat-Pack Hacks: Clever Ways to Make Cheap Furniture Look Expensive
Flat-pack furniture revolutionized the way people furnish their homes. It made modern, clean interior design accessible to almost any budget. However, mass-produced, budget-friendly furniture comes with a distinct downside: it looks ubiquitous. When every second apartment features the exact same minimalist bookcase or laminate media console, a home can start to feel more like a showroom catalog than a personal sanctuary. Furthermore, the lightweight materials and basic finishes can sometimes broadcast a cheap aesthetic.
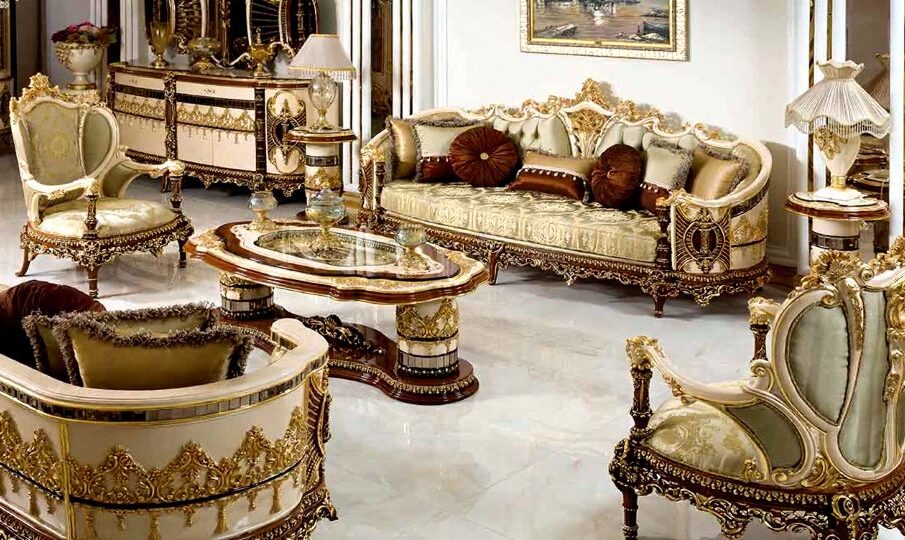
Fortunately, you do not need to spend thousands of dollars at high-end design boutiques to achieve a custom, luxury look. With a bit of creativity, strategic hardware choices, and basic DIY techniques, you can transform standard flat-pack items into unique, expensive-looking statement pieces. Here is how to elevate your budget furniture from basic to bespoke.
Upgrade the Hardware for an Immediate Face-Lift
The easiest and most impactful modification you can make to any piece of flat-pack furniture is replacing the stock hardware. Manufacturers of mass-produced furniture save money by including generic, lightweight plastic or basic aluminum handles, pulls, and knobs. These components are a dead giveaway of a budget item.
By swapping them out for high-quality alternatives, you instantly alter the perceived value of the entire piece. Consider the following hardware upgrades:
-
Solid Metals: Look for solid brass, matte black iron, or brushed stainless steel pulls. The physical weight of heavy metal hardware provides a tactile sense of luxury every time you open a drawer.
-
Leather Pulls: For a modern, Scandinavian, or organic aesthetic, replace traditional handles with loops made of genuine leather secured with a single metallic rivet.
-
Unique Shapes and Textures: Avoid the basic cylindrical bars found in every big-box store. Instead, search for knurled textures, T-bar handles, or organic, asymmetrical geometric shapes that look like custom artisan creations.
When executing this hack, ensure you measure the center-to-center distance between existing screw holes so your new hardware fits perfectly without needing to drill and fill.
Swap the Legs to Alter the Silhouette
Most budget furniture sits flat on the floor or relies on blocky, uninspired plastic or particleboard feet. Elevating a piece off the ground changes its entire silhouette, making it look lighter, more sophisticated, and structurally integrated into the room.
The market for aftermarket furniture legs is vast. You can purchase beautifully turned wooden legs, mid-century modern tapered legs, or industrial hairpins that screw directly into the base of your flat-pack units.
For the best results, paint or stain wooden replacement legs to match or deliberately contrast the main body of the furniture. If you are adding legs to a heavy unit like a wide dresser or a media console, ensure you add a central support leg to prevent the center of the budget material from sagging over time.
The Power of a High-Quality Paint Job
A fresh coat of paint can entirely hide the mass-produced origins of laminate or veneer furniture. However, painting flat-pack items requires a specific approach; you cannot simply apply standard latex wall paint to a slick, non-porous laminate surface and expect it to hold up.
To achieve a flawless, factory-like finish that looks incredibly expensive, follow a rigorous preparation process:
Demolish the Gloss with Sanding
Use a fine-grit sandpaper (around 220 grit) to gently scuff the entire surface of the furniture. You are not trying to sand through the material; you simply want to remove the slick sheen and create a microscopic texture for the paint to grip.
Use a High-Bonding Primer
This is the most crucial step. Standard primers will peel right off laminate. Invest in a specialized, shellac-based or high-adhesion primer designed explicitly to stick to glossy, difficult surfaces. Let it dry completely according to the manufacturer guidelines.
Choose the Right Paint Finish
Avoid high-gloss finishes, which can accidentally highlight minor imperfections in budget construction. Instead, opt for satin, eggshell, or chalk paints. Rich, moody tones like charcoal grey, deep forest green, navy blue, or warm terracotta instantly ground a piece and convey a high-end, custom-designed atmosphere.
Add Architectural Dimension with Molding and Trim
Luxury furniture often features beautiful millwork, overlay details, and deep recess lines that catch the light. Flat-pack furniture, by contrast, is characterized by flat, featureless boards. You can easily bridge this design gap by adding trim or molding to drawer fronts and cabinet doors.
Visit a local home improvement store and browse the trim aisle. Look for thin, flat lattice strips or small decorative picture-frame molding. Using a simple miter box and hand saw, cut the trim at 45-degree angles to create frames that fit perfectly onto the face of your cabinet doors.
Attach the trim using strong construction adhesive or wood glue, clamp them in place until dry, and use wood filler to seamlessly blend the corner joints. Once painted over, the added depth gives the illusion of expensive, custom-built cabinetry.
Upgrade the Tops with Luxury Materials
When someone looks at a piece of furniture, their eyes naturally gravitate toward the top surface. If that surface is a seamless sheet of faux-wood laminate, the illusion of luxury vanishes. Upgrading the top surface of a console, sideboard, or nightstand can completely trick the eye.
One incredibly popular hack involves ordering a custom piece of stone, such as marble or quartz, from a local stone yard to place directly on top of a flat-pack storage unit. Often, stone fabricators have small remnant pieces left over from kitchen counter installations that they will cut and polish for a fraction of the price of a full slab.
If stone is out of your budget, consider a beautiful wood top. Purchase a solid wood project panel or a butcher block counter remnant, stain it a deep, rich walnut or warm oak, seal it with a clear polyurethane, and secure it to the top of your budget unit. The contrast between a painted base and a solid wood or stone top looks impeccably upscale.
Create Built-In Illusion with Multiple Units
High-end homes often feature wall-to-wall built-in bookshelves and storage units that are custom-framed by carpenters. You can replicate this exact look using multiple standard bookcase units placed side by side.
The secret to making separate flat-pack bookcases look like a singular, architectural built-in lies in the finishing details:
-
Anchor Securely: Bolt the individual units tightly to each other and directly into the wall studs so there are absolutely no gaps between them.
-
Add Baseboards and Crown Molding: Run a continuous piece of baseboard molding across the very bottom of the combined units and crown molding across the top where they meet the ceiling. This visually anchors the furniture to the actual structure of the room.
-
Fill the Seams: Use caulk to fill the vertical lines where the separate units touch. Once caulked and painted over with a uniform color, the seams disappear entirely, leaving you with what looks like a multi-thousand-dollar custom library installation.
Frequently Asked Questions
Is it safe to drill new holes into particleboard or MDF furniture?
Yes, but you must exercise caution. Particleboard and Medium-Density Fiberboard (MDF) are prone to crumbling if handled aggressively. Always use a sharp drill bit and place a scrap piece of wood tightly against the back of the panel you are drilling through to prevent the material from blowing out or splintering as the bit exits.
How can I make contact paper or faux-marble vinyl wrap look realistic?
The key to using contact paper successfully is application technique and placement. Use a squeegee or felt-edged tool to smooth out air bubbles as you go, and use a hair dryer on a low heat setting to help the vinyl stretch cleanly around tight corners and edges. To maintain the illusion of reality, only use vinyl wraps on small surfaces like nightstand tops, rather than wrapping an entire large wardrobe.
Can I apply real wood veneer over slick laminate furniture?
Yes. You can purchase pressure-sensitive or iron-on real wood veneers sheets. This allows you to cover cheap, white laminate with genuine oak, walnut, or maple surfaces. After applying the veneer to the flat surfaces, you can trim the edges with a utility knife, sand them smooth, and stain them just like a solid piece of hardwood.
What should I do if the pre-drilled hardware holes are too large for my new handles?
If your new luxury hardware requires different spacing or smaller holes, you can fill the old, pre-drilled holes using a heavy-duty wood filler or epoxy putty. Once the filler dries completely, sand it down flush with the surface, prime it, paint over it, and then drill your new, correctly sized holes.
How do I stop flat-pack backing boards from looking cheap and flimsy?
The thin, folded cardboard backing sheets included with budget bookshelves are a major indicator of low quality. You can upgrade this by discarding the cardboard and replacing it with a thin sheet of plywood or beadboard cut to size at a hardware store. Alternatively, you can cover the standard cardboard backing with an elegant, textured wallpaper before sliding it into place to add an unexpected pop of high-end pattern.
Will altering my flat-pack furniture void the store return policy?
Yes. The moment you paint, sand, drill, or apply glue to any component of the furniture, you void the manufacturer warranty and the store return policy. Always assemble the item completely according to the instructions first to ensure there are no missing or broken parts before you begin your custom modifications.